Player Display Setup
This tutorial walks you through setting up and using the Player Display - a second window that shows your players what their characters can see while you maintain full DM control.
Time to complete: 5 minutes
What you’ll learn:
- Set up a second screen for players
- Open and control the Player Display
- Understand what players see vs. what you see
- Use Blackout mode for dramatic reveals
Prerequisites
- Completed Tutorial 3 (DM Map window basics)
- Ideally: a second monitor, TV, or projector for players
The Two-Screen Setup
The Player Display creates a two-screen experience:
| Your Screen (DM) | Player Screen |
|---|---|
| Full map with all tokens | Fog of war applied |
| Monster names and stats | Token images only |
| Hidden tokens visible | Hidden tokens invisible |
| All controls and tools | Clean, focused view |
This lets you manage everything behind the scenes while players see only what their characters would see.
Step 1: Connect Your Second Screen
Before opening the Player Display, connect your second screen:
- TV or Monitor - HDMI/DisplayPort connection
- Projector - For tabletop projection
- Extended Display - Not mirrored (each screen shows different content)
Display Arrangement
On your computer:
- Open display settings
- Set to “Extend” (not “Mirror”)
- Arrange screens to match physical layout
- Note which screen is secondary
Step 2: Open the DM Map Window
- Open your campaign
- Go to the Modules tab
- Select a module and click Play — the DM Map window opens
- Make sure a map is selected in the Map dropdown at the top left of the window
Step 3: Open the Player Display
In the DM Map window’s toolbar:
- Click the Display button
- A new window opens
- The button changes to show Display On
Position the Window
Drag the Player Display window to your secondary screen:
- Click and hold the window title bar
- Drag to the player-facing screen
- Maximize the window (or press F11 for fullscreen)
Tip: On macOS, you can use Mission Control to move windows between spaces. On Windows, use Win+Shift+Arrow keys.
Step 4: Understanding the Views
What You See (DM View)
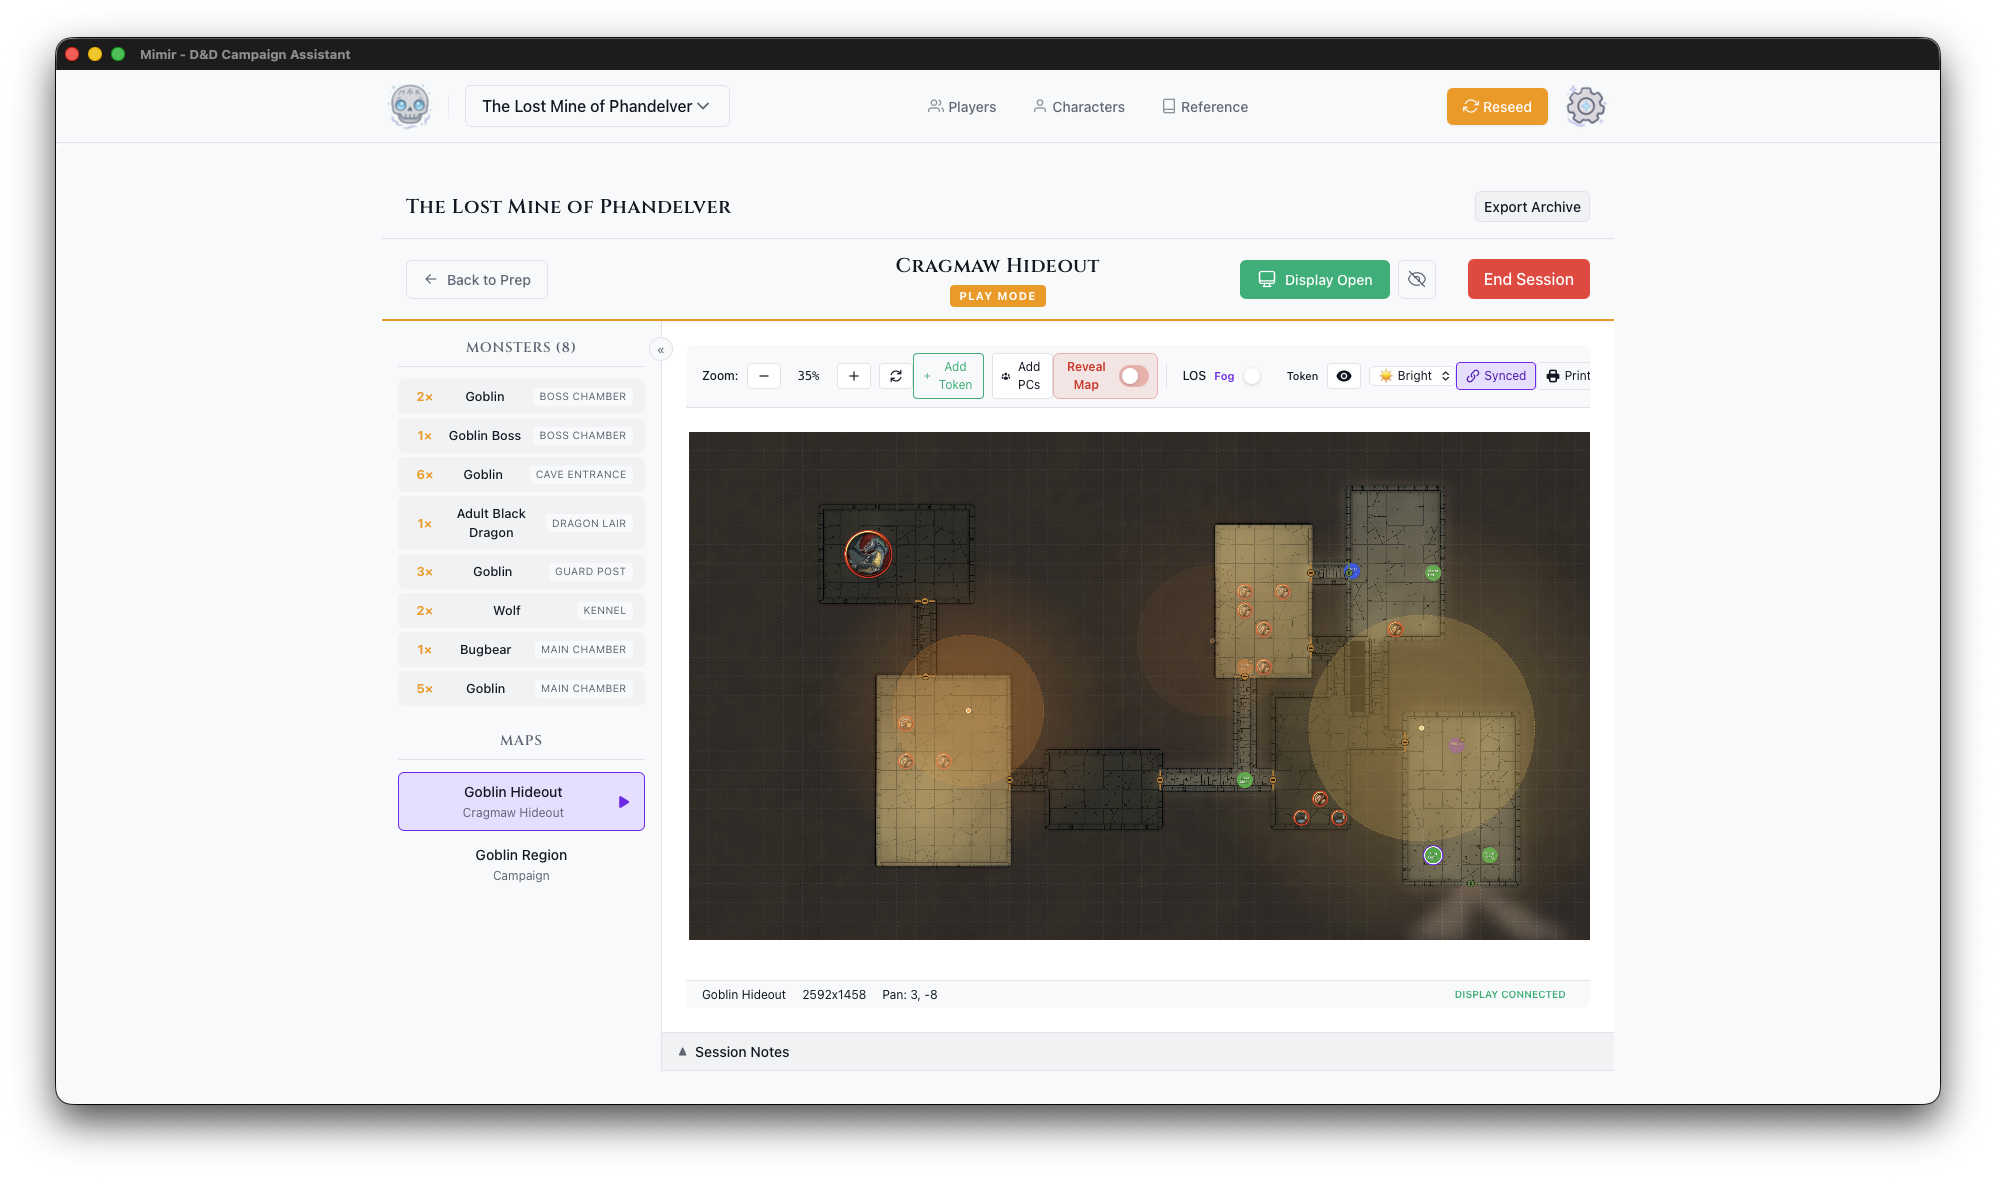
Your view shows everything:
- All tokens (visible and hidden)
- Token names and labels
- Full toolbar and controls
- Line of sight visualization (debug overlays)
What Players See
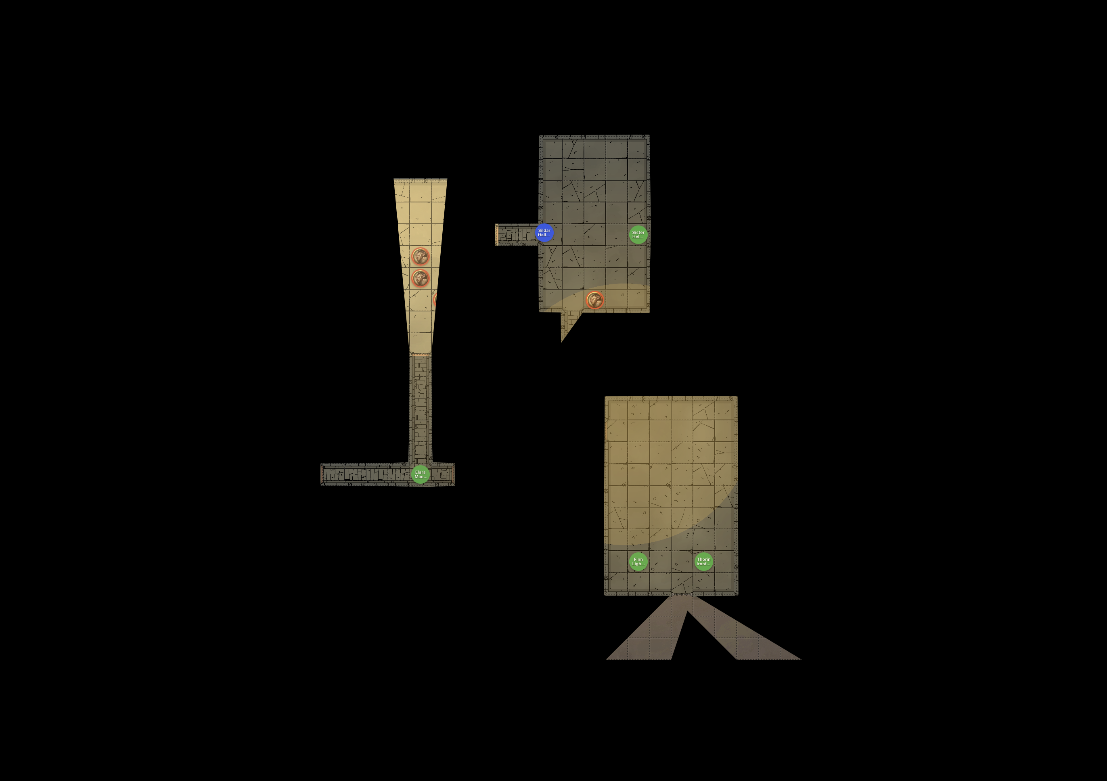

The player display shows:
- The map image
- Fog of war based on PC positions
- Visible tokens only (no hidden enemies)
- Token images without names
- No controls or UI elements
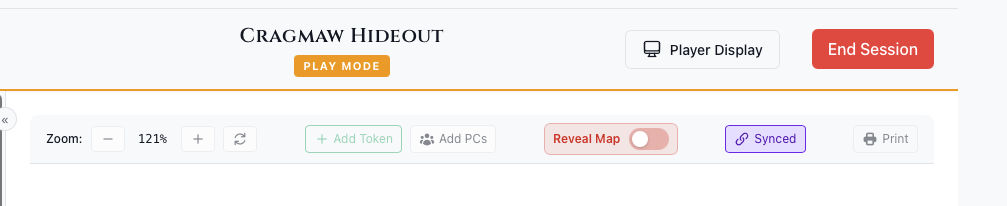
Step 5: Controlling What Players See
Fog of War
With Fog enabled in the map toolbar (UVTT maps only — fog needs wall data), fog of war updates automatically based on:
- Where PC tokens are positioned
- Their vision radius (including darkvision)
- Active light sources
- Walls and obstacles
Move a PC token and watch the fog update in real-time on both screens.
Reveal Map Toggle
For situations where you want to show the whole map:
- Find the Reveal Map toggle in the toolbar
- Enable it to bypass fog of war
- Disable it to restore fog of war
Use this for:
- Area maps without exploration
- Post-combat wrap-up
- Location reveals
Ambient Lighting
The ambient light level affects visibility:
| Level | Effect |
|---|---|
| Bright | Normal visibility, full colors |
| Dim | Reduced visibility, muted colors |
| Dark | Only darkvision and light sources work |
Change this to match the in-game environment (dungeon, night, etc.).
Step 6: Using Blackout Mode
The Blackout button (a crossed-out-eye icon with the tooltip “Toggle Blackout”) appears next to Display On in the DM Map window toolbar while the display is open:
- Click Blackout to hide everything from players
- The player screen blacks out and shows “Display Paused”
- Click again to restore the view
Blackout is handy whenever you want to change something without the players watching — setup, map transitions, or a dramatic reveal.
Step 7: Closing the Display
When your session ends:
- Click the Display On button again, or
- Close the player display window directly
- The button returns to Display
The DM Map window stays open - you can reopen the display anytime.
Setup Tips
For in-person play, position the TV, monitor, or projector so all players can see it, and adjust brightness for the room. For remote play, screen-share the Player Display window through your video call app.
If something isn’t working, see Troubleshooting.
Next Steps
You can now create campaigns, build modules with maps and encounters, run sessions with fog of war, and use a second screen for players. One tutorial remains: creating your own homebrew content.
Next tutorial: Creating Homebrew Content