Add Monsters
Add monsters from the D&D 5e catalog or your homebrew collection to your maps via Token Setup.
Steps
- Open a module from the Modules tab
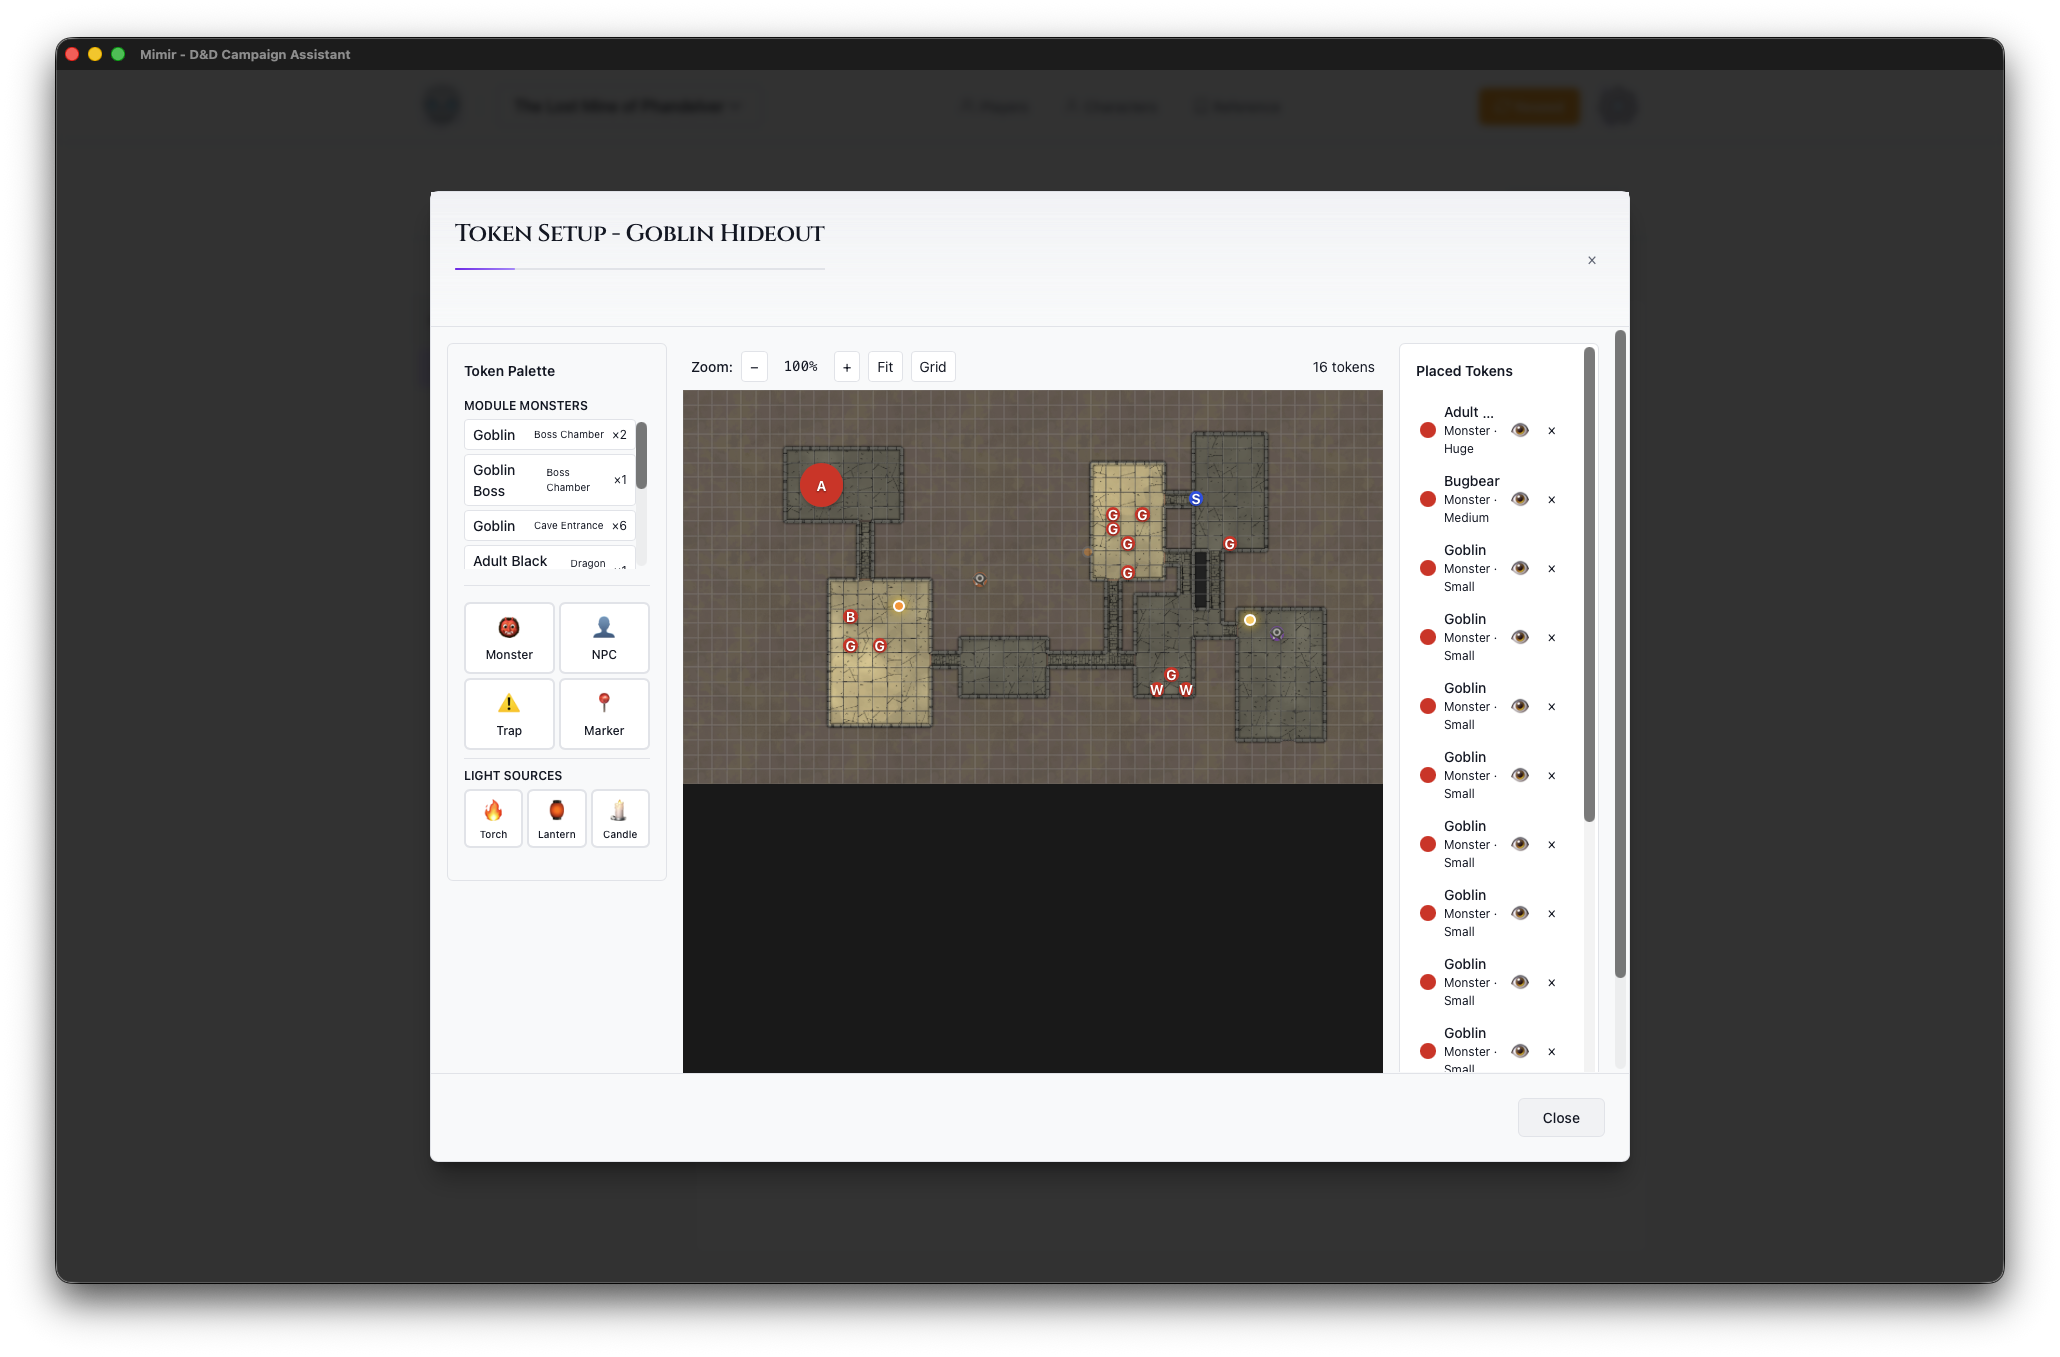
- Click the Place Tokens button on a map card to open Token Setup
- In the Token Palette, click Monster
- Search by name (e.g., “Goblin”, “Dragon”, “Zombie”)
- Select a monster from the results
- Configure token options (size, color, visibility)
- Click on the map to place the monster token
Monster Search
Type a monster name in the search field to filter results. Results show CR and source for quick reference. Homebrew monsters you’ve created in the campaign’s Homebrew tab also appear in search results alongside catalog entries.
Token Options
Before placing, configure:
- Size - Tiny, Small, Medium, Large, Huge, Gargantuan
- Color - Border color to distinguish groups
- Visible to Players - Hide for surprise encounters
Placing Multiple Monsters
To add multiple of the same monster:
- Search and select the monster
- Click on the map to place each one
- Each placement creates a new token
Each click on the map places an individual token.
Managing Monster Tokens
Placed monsters appear in the Placed Tokens panel (right side):
- Click to select on map
- Drag to reposition
- Click × to delete
- Right-click for more options
Viewing Monster Stats
In Play Mode, click any monster in the sidebar to see:
- Full stat block
- Ability scores and modifiers
- Actions and special abilities
- Legendary actions (if applicable)
Module Monsters Quick Select
Once you’ve added monsters to a map, the Token Palette shows a Module Monsters section at the top with quick-select buttons for monsters already in the module. This saves time when placing the same monster on multiple maps.
Tips
- Add monsters during prep, not at the table
- Use different colors to distinguish enemy groups
- Hide tokens for surprise encounters
- Search by CR to find level-appropriate challenges
- Create homebrew monsters in the Homebrew tab if you need custom creatures